
Windows 10 lock screen images are a fun way to personalize your device. You can choose from a variety of images, or you can create your own.
Windows Lock Screen Images: How to Find and Change Them
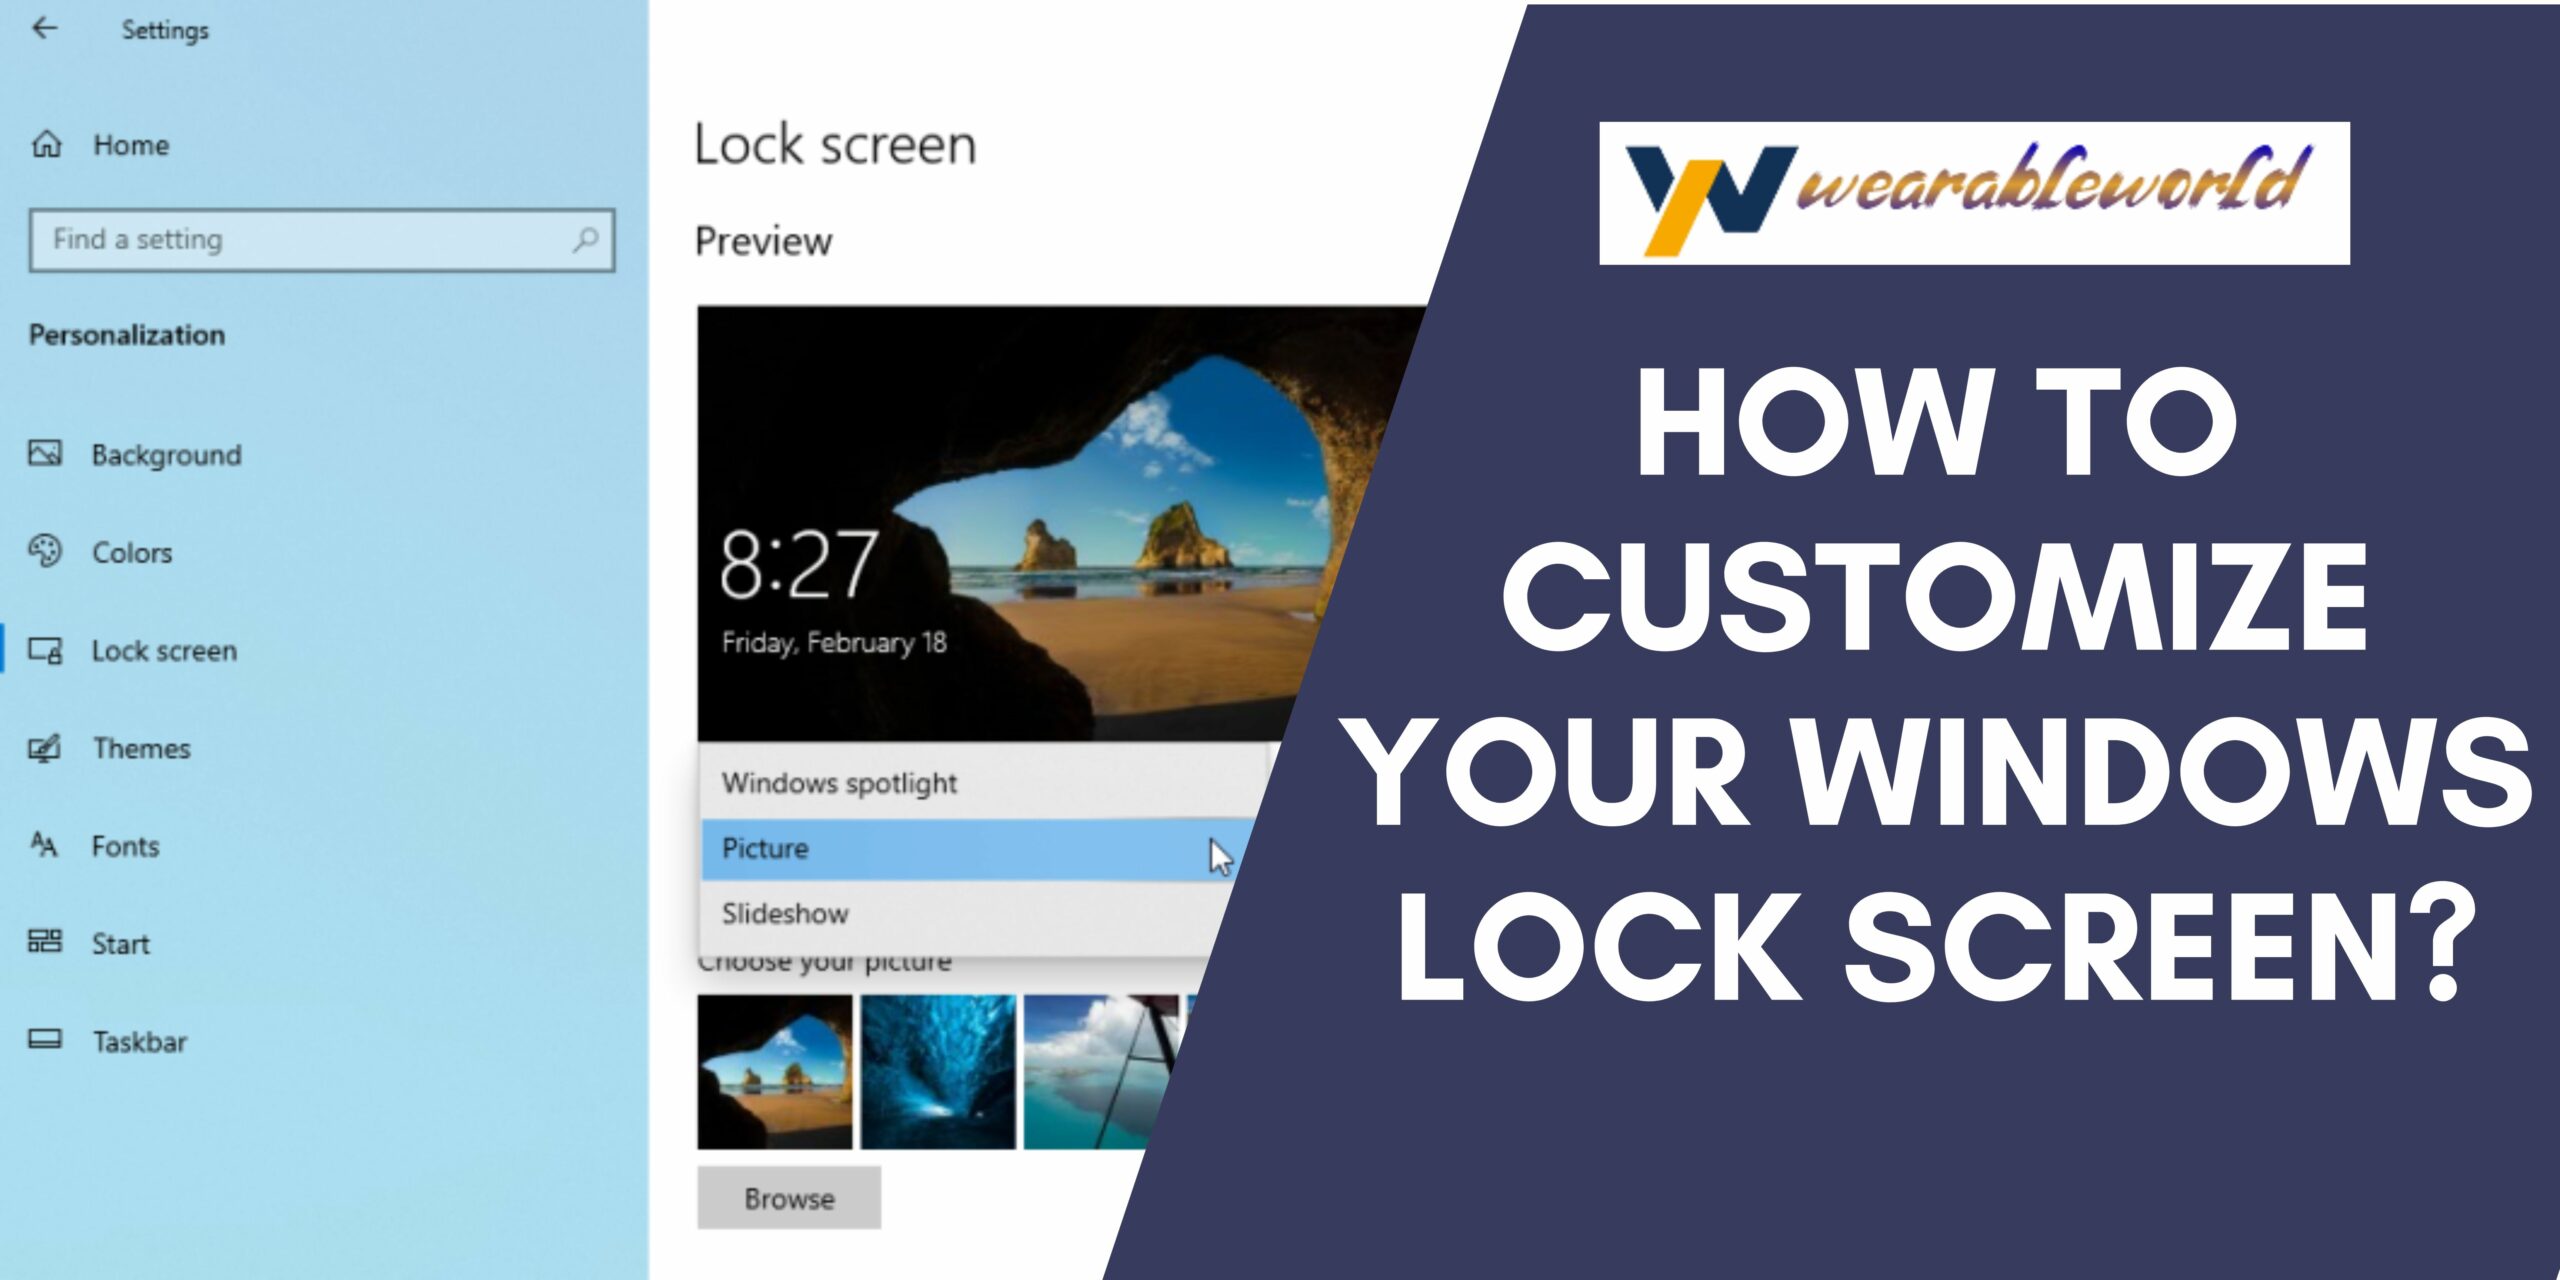
Lock screen images are the small images that show up on the Windows 10 lock screen. They can be a fun way to show your personality or a clever way to remind you of your goals for the day.
To change your lock screen image, open the “Lock Screen” section of the Settings app. Here, you’ll find a list of all the images that are currently available. You can select one or more of these images to show on your lock screen.
If you want to customise your lock screen image even further, you can use the “Background” section of the Settings app. Here, you can select a photo or video from your computer, or from the internet. This will be used to create the background behind your lock screen image.
If you want to remove an image from your lock screen, just select it and hit the “X” button.
The Best Windows Lock Screen Images
Windows 10 has a new lock screen that can be customized to show your favorite photos, videos, or emojis.
The lock screen can be accessed by clicking the “lock screen” tile on the Start Menu.
To customize the lock screen, open the “lock screen” tile and click the “lock screen images” tab.
You can select from a variety of images to use as your lock screen.
The images can be stored in a Pictures library or added from the web.
You can also use the “lock screen background” to change the background color of the lock screen.
The “lock screen text” can be customized to show your name, date, time, or message.
How to Customize Your Windows Lock Screen
If you’re like most people, you love customizing your Windows 10 lock screen. You can add your favorite photos, videos, and designs, and make your lock screen look just the way you want it to.
But how do you do all this? Here’s a step-by-step guide to customizing your Windows 10 lock screen:
1.Open the Lock Screen app on your device.
2.Click the “Settings” tab.
3.Click the “Personalization” button.
4.Select the “Windows Theme” you want to use.
5.Click the “Photos” tab.
6.Select the photos, videos, or designs you want to use as your lock screen background.
7.Click the “Set Lock Screen Background” button.
8.Enter your password to confirm your changes.
That’s all there is to it! You’re now ready to start customizing your Windows 10 lock screen to your own unique style.
Ways to Change the Lock Screen on Windows
Windows 10 is a great operating system with a ton of new features. One of those features is the lock screen. The lock screen is a screen that comes up when you start your computer, and it displays your current password, date, time, and other information.
There are a ton of ways to change the lock screen on Windows 10. This article will teach you all about it.
First, open the Start menu.
Next, click the Lock Screen and Security icon.
On the Lock Screen and Security page, click the Change Lock Screen button.
On the Change Lock Screen page, you can change the following things:
1) Password: Change the password for your computer.
2) Date and Time: Change the date and time that your computer displays.
3) Background Image: Change the background image that your computer displays.
4) Second Lock Screen: Turn on the second lock screen. This will show a password screen when you start your computer, and you can bypass the lock screen by pressing the Windows key and L.
5) Customize: Change other settings on the Change Lock Screen page.
6) Save Changes: Click the Save Changes button to save your changes.
7) Close: Click the Close button to close the Change Lock Screen page.
Now, you can change the lock screen image, password, and date and
How to Get a Slideshow on Your Windows Lock Screen
Step One: Open the “Lock Screen and Security” app and click on the “Set Up a New Lock Screen” button.
Step Two: From the “Layout” drop-down menu, select the “Slideshow” layout.
Step Three: Select the photos or videos you want to appear on your lock screen and click on the “Add” button.
Step Four: Enter a name for your slideshow and click on the “Confirm” button.
Step Five: You can now choose the time interval between slides and click on the “OK” button.
Step Six: You’re done! Your new slideshow will appear on your lock screen the next time you login.
Conclusion
Windows 10 is a great operating system and has a lot of features. However, one downside is that the lock screen images are not very good. Microsoft should improve this in future updates.

