

Are you looking for a way to organize your email communications in Outlook for Mac? You’re not alone. Many people find email groupings to be an effective way to manage their email inboxes. In this article, we’re going to show you how to create a new email group in Outlook for Mac.
How To Create A Group Email In Outlook 2022
How To Create An Email Group In Outlook For Mac
- Email groups are a great way to organize your email and make it easier to find what you are looking for. In this article, we will show you how to create an email group in Outlook for Mac.
- To create an email group in Outlook for Mac, first, open the email you want to create the group for. Then, click on the Groups tab and select New Group.
- In the New Group dialog box, enter the name of the group and select a group type. You can choose from several group types, including Company, Meeting, or Contact.
- Click on the Email Addresses tab and select the addresses you want to include in the group. You can add addresses directly from the email or from your contacts list.
- Click on the Groups tab and select the group you just created. You will now see all of the emails in the group. You can click on an email to open it in the content pane and then click on the Group button on the toolbar to access group-specific features.
Email groups are a great way to organize your email and make it easier to find what you are looking for.
Adding Contacts To An Email Group In Outlook For Mac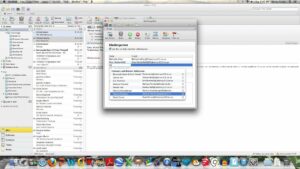
If you want to add contacts to an email group on your Mac, there are a few things you need to do first:
- First, open the email group you want to add contacts to.
- Next, click the email icon in the group’s header.
- This will open the email’s contents in a new window.
- Finally, click the “Contact List” button in the new window.
- This will open the “Contact List window”.
- In the “Contact List window”, you will need to find the person you want to add to the email group.
- To do this, the first search for the person’s name in the “Contact List”.
- Once you have found the person, select them by clicking on their name.
- Now, you will need to add the person to the email group.
- To do this, click on the “Add to Group” button.
- This will open the “Add Group window”.
In the “Add Group window”, you will need to fill in the following information:
- The email address of the person you want to add to the email group.
- The name of the email group.
- The password of the email group.
- The email notification settings for the email group.Once you have filled in all the information
Creating A New Email Group In Outlook For Mac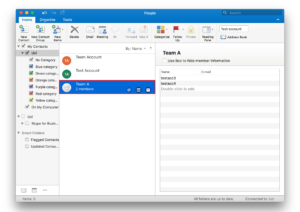
There are so many great ideas floating around the blogosphere, I wanted to start a new email group to keep everything in one place and share some of my own tips and tricks.
If you’re interested in joining, please email me at info@[mydomain] and let me know what interests you the most. I would also love to hear your thoughts on the group so far!
Exporting An Email Group From Outlook For Mac
If you have an email group that you want to export from Outlook for Mac, there are a few things that you need to do first:
- First, open Outlook for Mac and open the email group that you want to export.
- Next, click the gear icon in the top right corner of the email group and select Export Email Group.
- On the Export Email Group dialog box, you will need to specify a name for the exported email group.
- Finally, you will need to specify a destination for the exported email group. You can choose to export the email group to a file or to an email address.
- Once you have completed these steps, the email group will be exported and you can use it in another application or on another computer.
Importing an Email Group into Outlook for Mac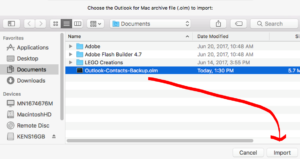
If you have an email group in outlook that you would like to import into your Mac, there are a few things you need to do first.
- Open Outlook for Mac and sign into your account.
- Click on the file icon in the top left corner of the screen. This will open the file explorer.
- If the email group is not in the main list, you will need to select “Mail” from the list on the left and then “Groups” from the list on the right.
- Once the groups are selected, you will see a list of all the groups in your account. Select the email group you want to import.
- Once the group is selected, click on the “Import” button in the top right corner of the screen.
- The next screen will ask you to provide a name for the group. You can either provide a name or leave the name as it is.
- The next screen will ask you to provide a description for the group. This is a good place to provide a more detailed explanation of the group.
- The next screen will ask you to provide a contact email for the group. This is where you will provide the primary contact email for the group.
- The next screen will ask you to provide a name for the group’s mailbox. This is where the group
Conclusion
If you are looking to easily create an email group in Outlook for Mac, then you have come to the right place! In this blog post, we will show you how to do just that.

