
Showing Extension Windows in Windows 7 is a handy way to keep track of which extensions are installed and enabled on your system.
How to show file extensions in Windows
There are a few ways to show file extensions in Windows. Most of the time, you can just right-click on a file and select “Properties”. In the “Details” window, you can click on the “Extensions” tab and then select the appropriate file extensions.
If you want to show file extensions only for certain types of files, you can use the “File Types” tab in the “Properties” window. This tab lets you specify which file types should show file extensions. For example, you can select the “All Files” tab to show file extensions for all files, or the “Text Files” tab to show file extensions for text files.
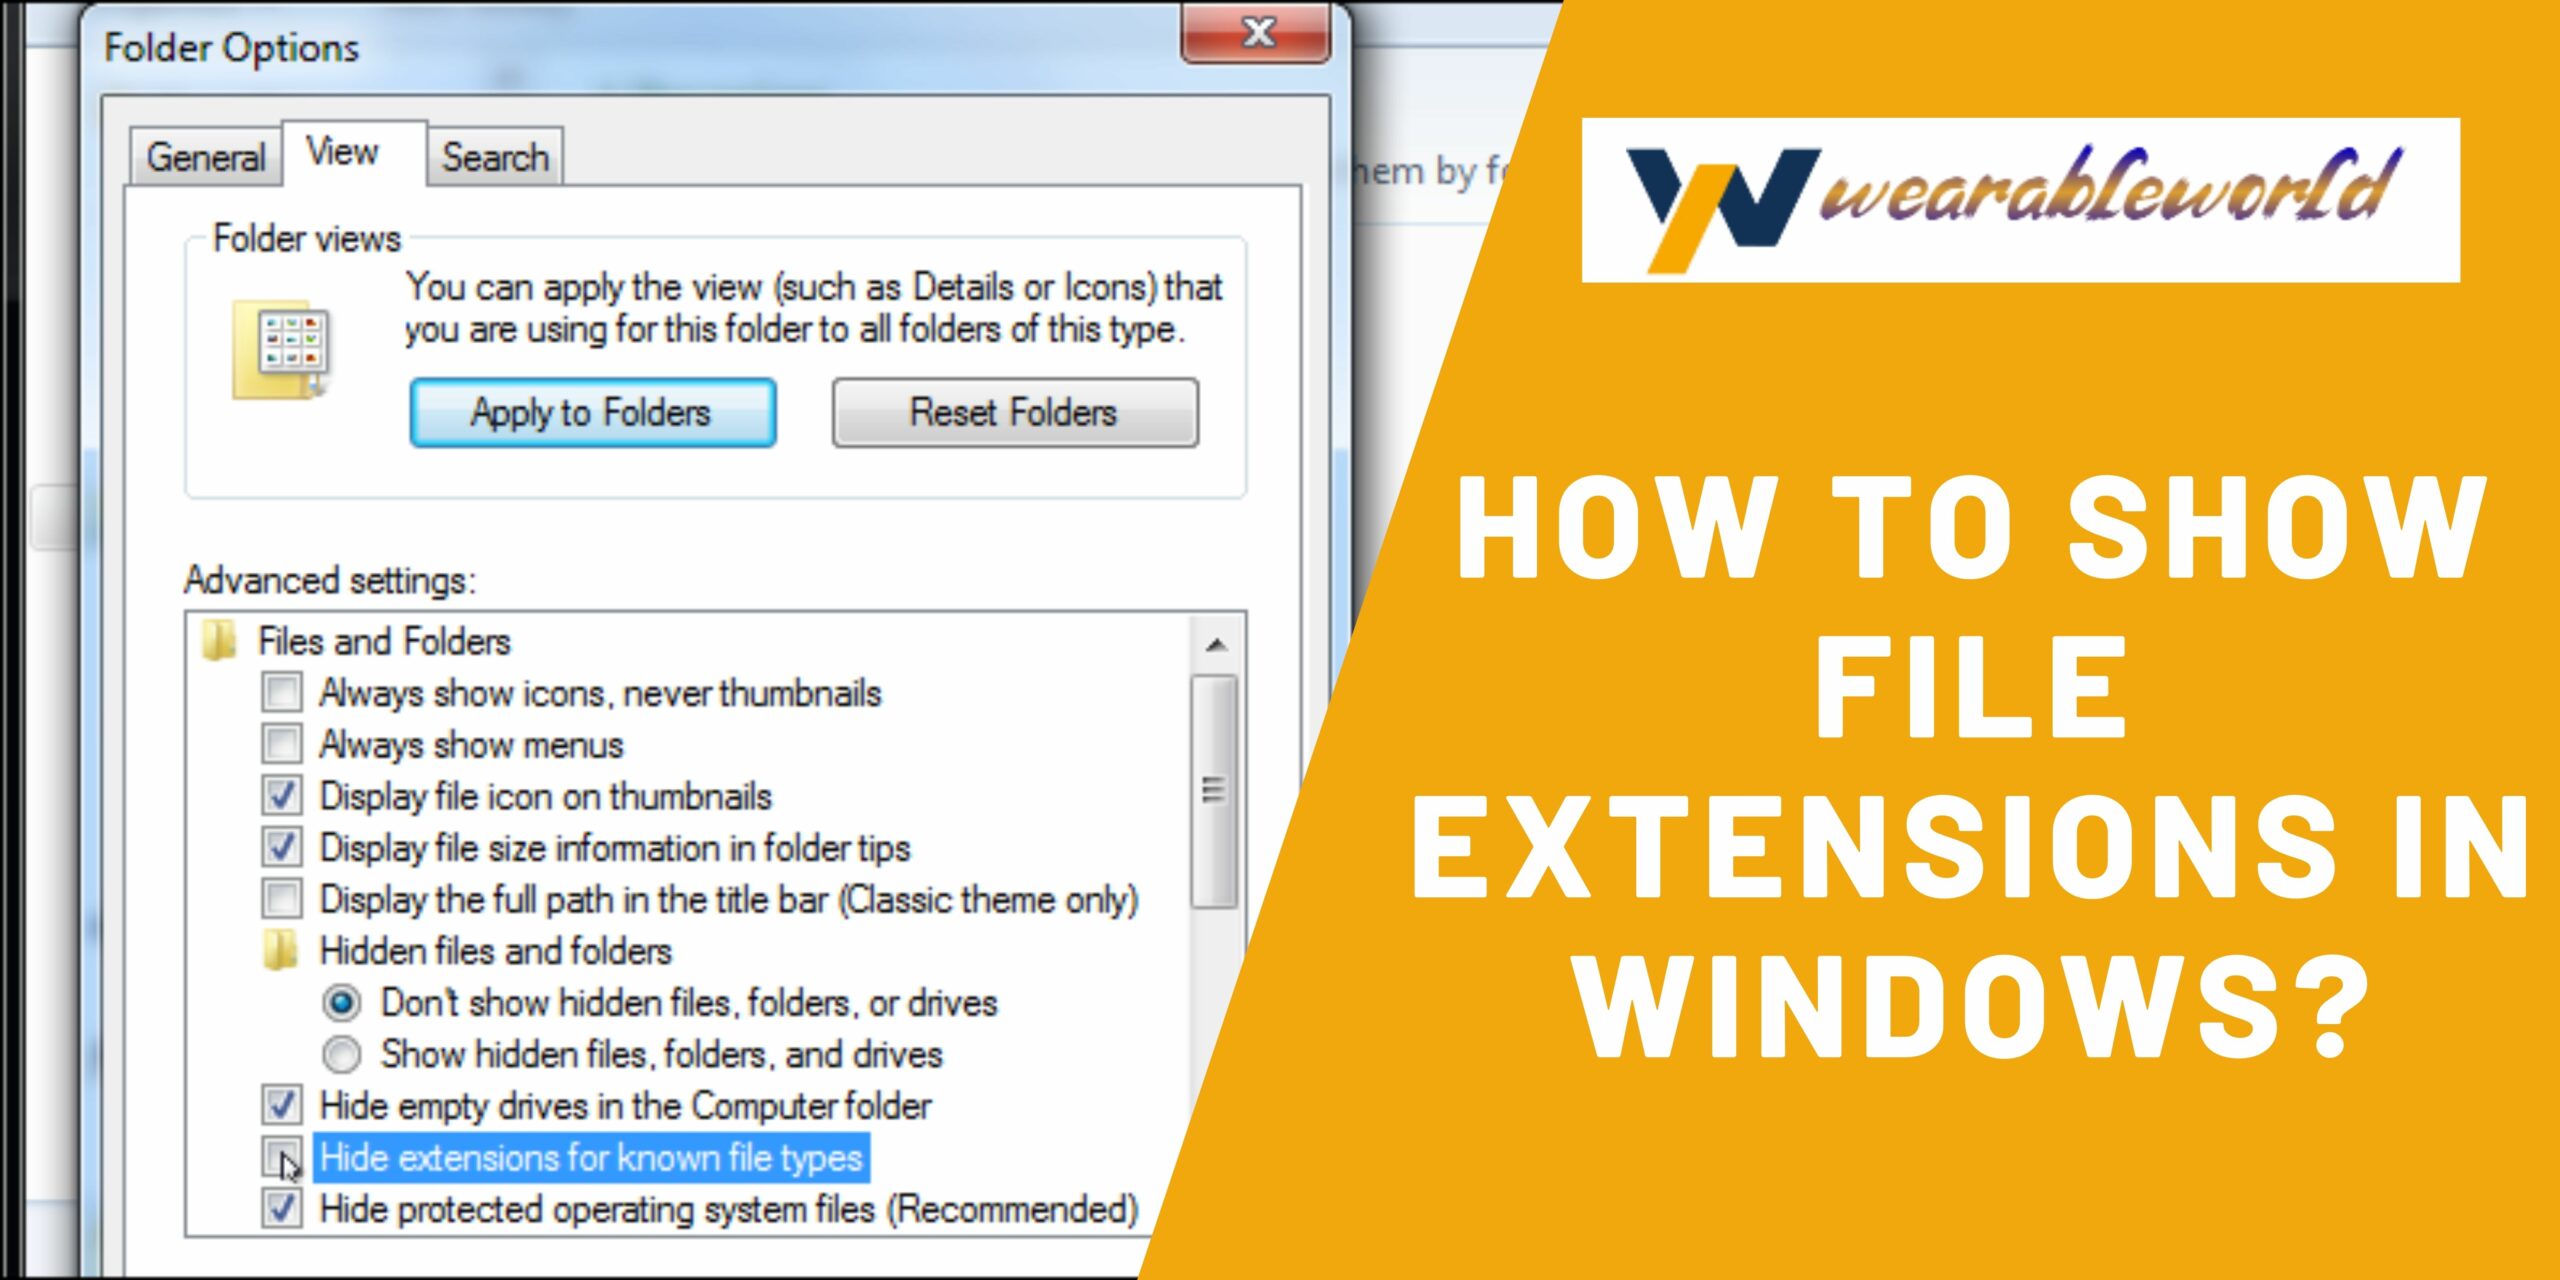
If you want to show file extensions only for certain folders, you can use the “Folder Options” window. This window allows you to specify which folders should show file extensions. For example, you can select the “Windows” folder to show file extensions for all files in the Windows folder, or the “Documents” folder to show file extensions for all files in the Documents folder.
If you want to show file extensions only for certain files in a certain folder, you can use the “File Type Associations” window. This window allows you to specify which file type should show file extensions for a specific file. For example, you can select the “.txt
How to make Windows show file extensions
There are a few ways to make Windows show file extensions. One way is to use the Windows menu, which is located in the top left corner of the screen. The menu includes a tab called “File.” Click on the tab to open it.
Another way to show file extensions is to right-click on a file and select “Properties.” The Properties window will open and you will see a tab called “Extensions.” Click on the tab to show the list of file extensions for the file.
The final way to show file extensions is to use a file extension extension explorer program, such as FileZilla or 7-Zip. You can find file extension explorers in the software section of most online computer stores.
How to enable file extensions in Windows
Windows 7 enables file extensions by default. To enable file extensions, follow these steps:
- Open Windows Explorer.
- Right-click on a folder.
- Select Properties.
- On the General tab, select the check box next to Enable file extensions.
- Click OK.
How to view file extensions in Windows
Windows 7 has a built-in program that can be used to view file extensions. To access this program, open the File Explorer (Windows key + E) and navigate to the directory where the file you want to view is located. Right-click on the file and select “Properties.”
On the “General” tab, you will see a list of file extensions. The list will be sorted in accordance with the file extension’s associated file type. In the “File type” column, you will see the following list:
.txt: Text files
.jpg: Image files
.docx: Microsoft Office document files
.xml: XML files
.ASP.NET: Microsoft .NET Framework 4 files
.cmd: command-line scripts
.bat: batch files
.js: JavaScript files
.html: HTML files
.css: CSS files
.js: JavaScript files
.png: Portable Network Graphics files
.gif: Graphics files
.pdf: Portable Document Format files
.wmv: Windows Media Video files
If you want to view a file’s extension, but don’t see the file type you are looking for, hover your mouse over the file type in the “File type” column and a “plus” (+) sign will appear next to the file type. Click on the plus sign to display a list of file extensions associated with that file type.
To view a file
How to change file extensions in Windows 7
- Open Windows Explorer by clicking on the Computer icon on the Start Menu, or by pressing the keyboard shortcut “Windows+E” on your keyboard.
- In the explorer window, right-click on the desired file and select “Properties”.
- On the “File Type” tab, select the “Extensions” drop-down menu and select the desired file extension. You can also type the desired file extension in the “Search for files with this extension” text box.
- Click on the “Permissions” tab and change the “Owner” and “Group” if desired.
- Click on the “OK” button to apply the changes and close the file properties window.
Conclusion
Windows 7 users can now enjoy the convenience of show extension windows by right-clicking on an empty area of the taskbar and selecting “Show Extension Windows.” For users of earlier versions of Windows, a workaround is to right-click on an open area of the taskbar and select “New Taskbar Button.”

