
![How to Protect Google Sheets [Use Lock] | Quick Guide 2022](https://i.ytimg.com/vi/dSabLuUvZ7U/hqdefault.jpg "How to Protect Google Sheets [Use Lock] | Quick Guide 2022")
Google Sheets is a great tool for managing data, but it can be difficult to keep track of who has access to which cells. You can use the lock feature to protect your data, but it can be difficult to remember to use it. This blog post will show you how to use the lock feature to keep your data safe.
Google Sheets – Protect (Lock) Certain Cells, Ranges, Sheets, And Formulas From Editing
How To Lock Cells In Google Sheets
Fear not, Google Sheets users! In this tutorial, we will walk you through the simple steps of locking cells in your spreadsheet to keep your data secure and private.
- First and foremost, it is important to know that you can lock cells in Google Sheets in a few different ways.
- You can use the built-in lock feature, or you can use a third-party tool like Excel’s Lock Cells function.
- The lock feature in Google Sheets is easy to use and can be accessed by clicking on the Lock icon in the top toolbar.
- When you click on the Lock icon, a list of options will appear.
In the list of options, you will see two options:
- Lock:- This option will lock the cell and prevent anyone from editing or deleting the content inside of it.
- Unlock:- This option will release the cell’s lock and allow you to edit or delete the content inside of it.
If you would like to use Excel’s Lock Cells function, you will first need to open Excel and select the cell that you want to lock. Next, you will need to select the Locked icon from the Ribbon’s Protection category.
When you select the Locked icon, a dialog box will appear that will allow you to specify a password for the cell. After you have entered a password, the cell will be locked and no one will be able to edit or delete the content inside
When To Lock Cells In Google Sheets
There are a few occasions when it might be appropriate to lock cells in Google Sheets:
- If you’re working on a confidential project and don’t want others to see the data you’re working on
- If you’re sharing a sheet with others and don’t want them to change the data while you’re working on it
- If you’re working on a project with a deadline and don’t want others to interfere with your work when you lock a cell, it means that no one else can edit the data inside that cell until you unlock it.
- This can be helpful if you’re working on a confidential project and don’t want others to see the data you’re working on.
- You can also use this feature if you’re sharing a sheet with others and want to ensure that they don’t change the data while you’re working on it.
- Lastly, locking cells can help you to focus on your work and avoid distractions.
The Benefits Of Locking Cells In Google Sheets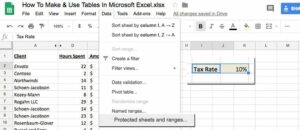
There are a few reasons why you might want to lock cells in Google Sheets:
- Perhaps you want to keep a particular cell private or prevent other users from editing the data in that cell.
- Whatever the reason, locking cells is a great way to ensure that your data stays confidential and safe.
- Plus, it can save you time and hassle when you need to keep track of specific details!
How To Protect Your Data With Locked Cells In Google Sheets
Google Sheets is a great tool for organizing and analyzing data, but it’s not without its weaknesses. One of these is that data can be easily accessed by anyone with access to your Google account. This is a problem if you want to protect your data from being accessed by unauthorized people.
One way to protect your data is to lock cells. This means that you password-protect each cell, preventing anyone else from editing or viewing the data inside. This is a great way to keep your data safe, and it’s easy to do. Here’s how:
- Launch Google Sheets.
- In the “Sheets” tab, click on the “Locked Cells” button.
- In the “Locked Cells” dialog box, enter your password to unlock the cells.
- To view or edit the data in a locked cell, you need to enter the password again.
- To disable locked cells, click on the “Unlock Cells” button and enter your password.
- By using locked cells, you can protect your data from unauthorized access.
- This is a great way to keep your data safe and organized, and it’s easy to set up.
Locking Cells In Google Sheets: The Ultimate Guide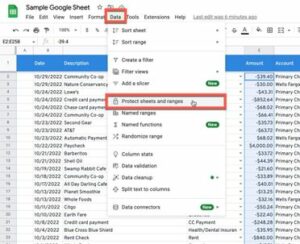
Google Sheets is a great tool for organizing and managing data. However, like any other software, it can be vulnerable to theft or malicious use. To prevent unauthorized access, you can lock cells. This will prevent other users from editing or changing the contents of the cell until you unlock it.
Here’s how to do it:
- Click on the cell you want to lock.
- On the toolbar, click on the Lock icon (lock with password).
- Enter your password to unlock the cell.
- To prevent others from editing the cell, select the Locked checkbox.
- Click OK to lock the cell.
Conclusion
If you’re ever worried about someone else getting to your spreadsheet before you do, you can lock it so that only you can access it.

