
Windows 7 includes a built-in tool to find your computer’s IP address. To use this tool, open the Control Panel, and then click Network and Internet. In the Network and Internet window, click Network properties. Under “IP address,” type the IP address of your computer. Click OK to close the Network and Internet window.
How to Find Your IP Address on Windows 7
Windows 7 comes with a built-in Network Location Utility that you can use to find your IP address. To do so, open the Network Location Utility by clicking the Start button, typing “networks”, and then clicking the Network Location category in the search results. Once you open the Network Location Utility, select the “Status” tab, and then click the “IP Address” button. Your IP address will be displayed in the “IP Address” column.
If you need to find your IP address on a regular basis, you can also use a network monitoring tool such as Network Utilities Pro or Little Snitch. These tools allow you to view all the traffic flowing through your computer, and they will also show you the source and destination IP addresses for each packet.
Using the Command Prompt to Find Your IP Address
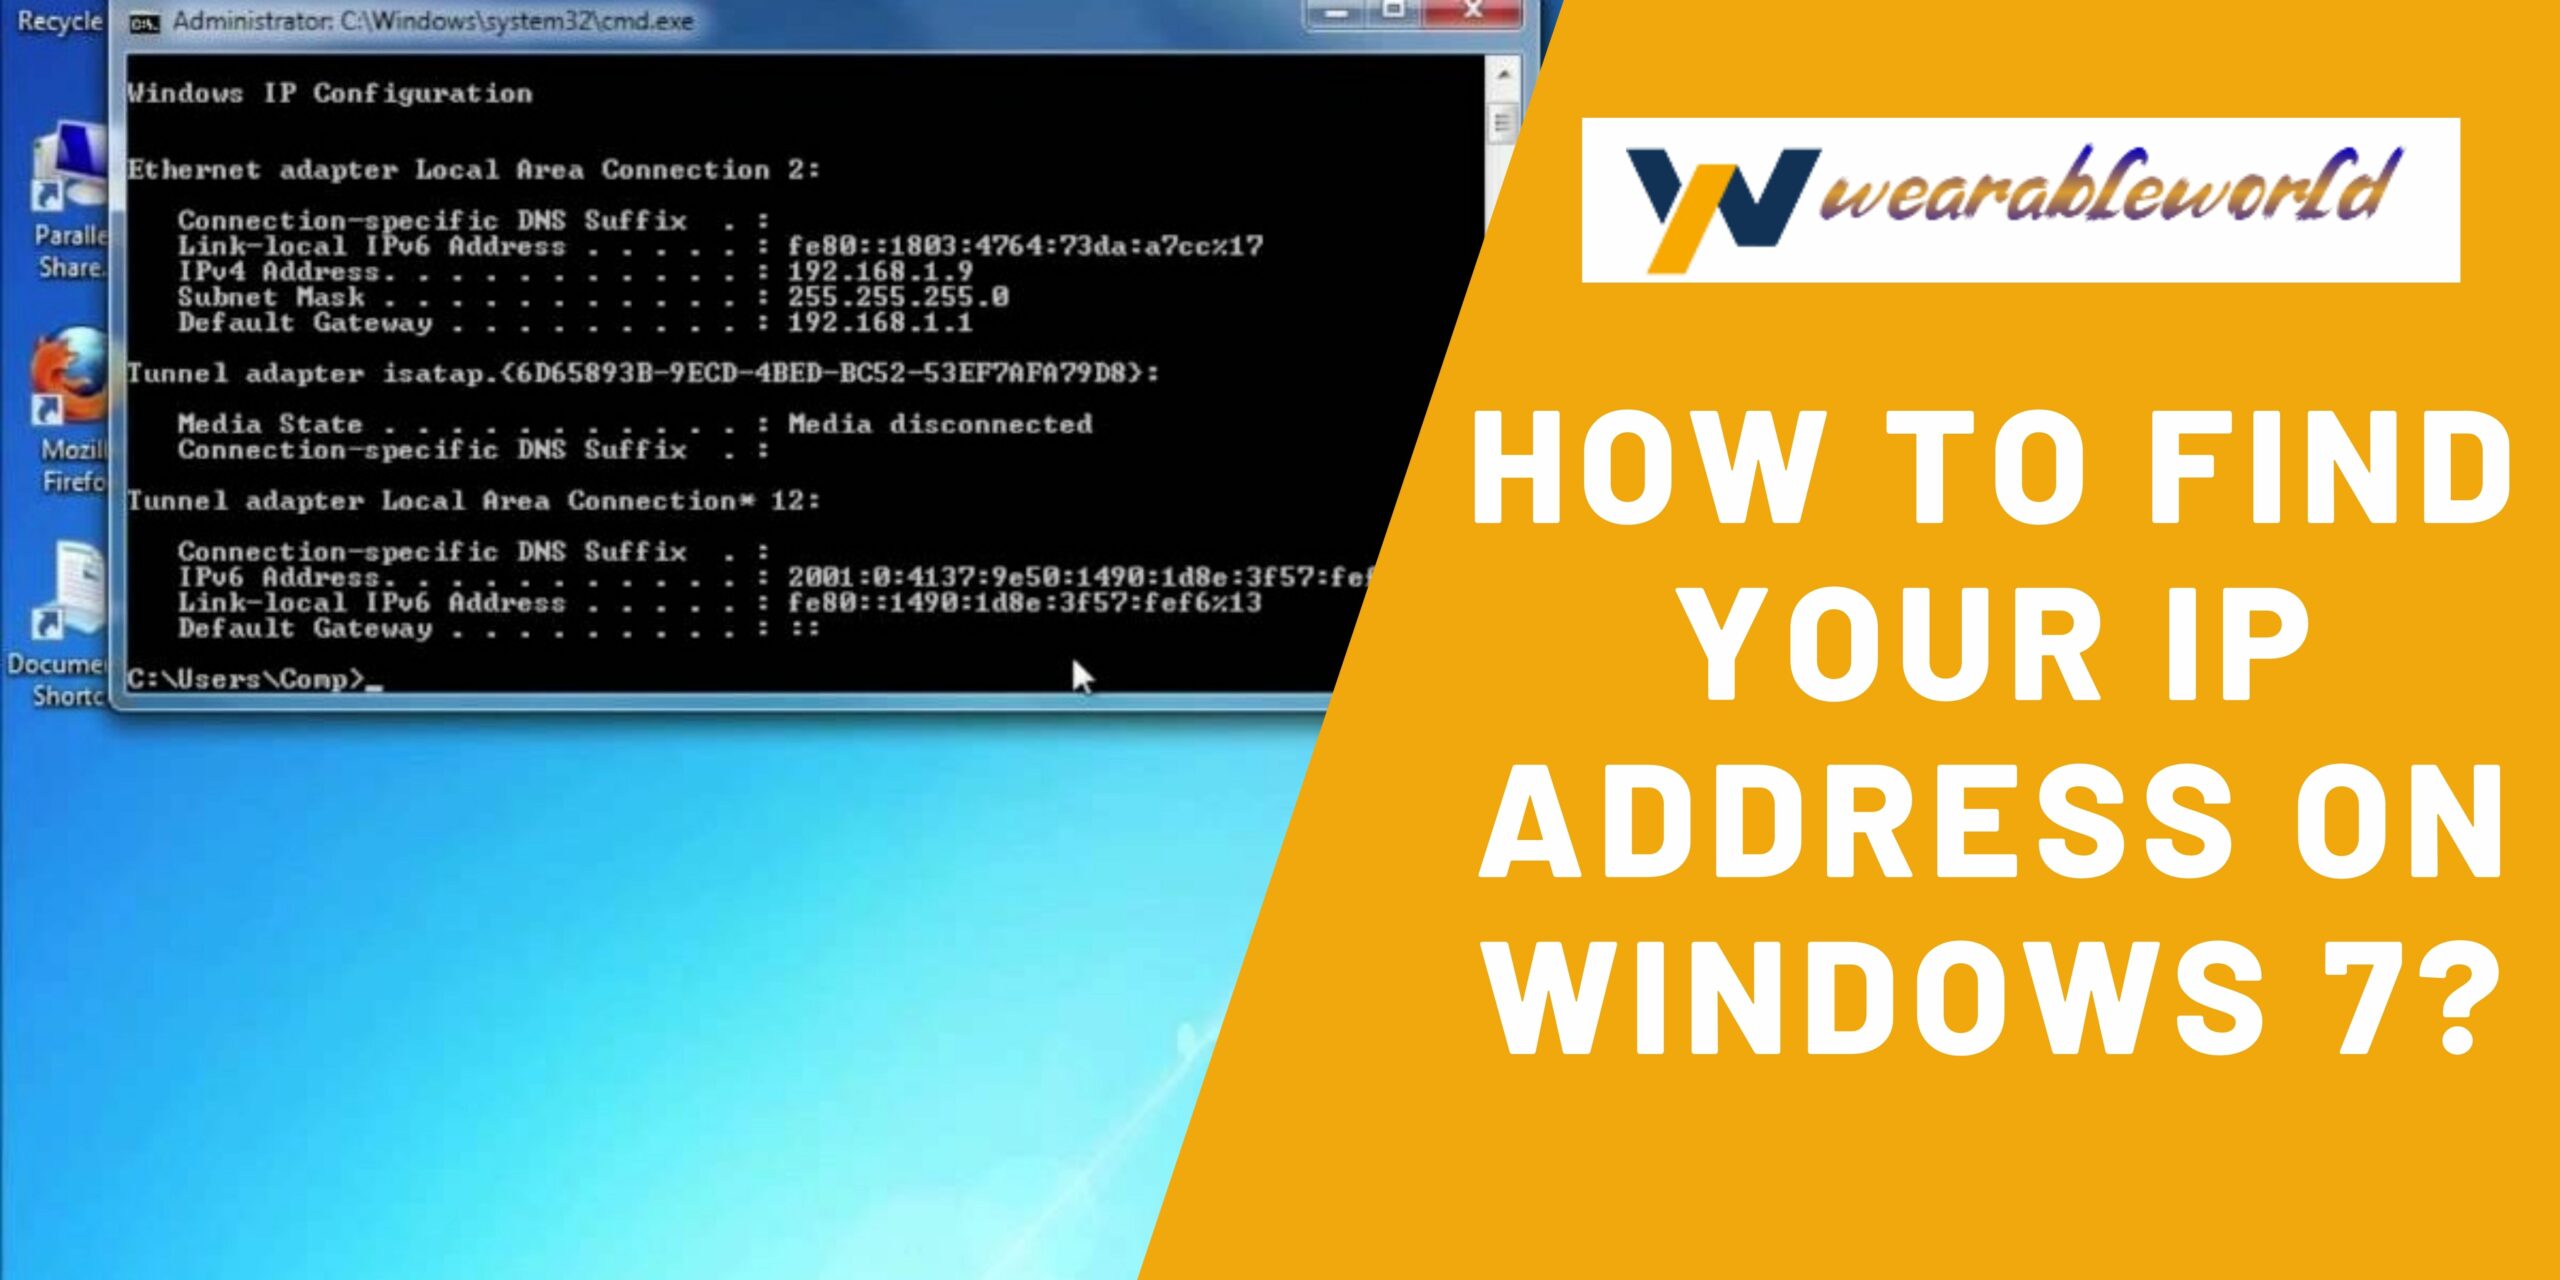
If you’re looking for your IP address on Windows 7, you can use the command prompt. To open the command prompt, click the Start button, type “cmd” (without the quotes), and then press Enter. To find your IP address, type the following command:
ipconfig
The ipconfig command will open a window that displays your current IP address, your default gateway, and your DNS server.
Using Network Connections to Find Your IP Address
One way to find your IP address on Windows is to use your network connections. To do this, open the Network and Sharing Center by pressing the Windows key and typing “Network and Sharing Center.” Click on the “View network connections” link in the left column.
If you have more than one network adapter, select the one you want to use to access the Internet. In the “Local Area Connection” or “Network Connection” column, right-click on the name of the connection and select ” Properties.”
In the “IPv4 Address” field, type in the IP address of the computer you are using. This IP address can be found by opening a web browser and entering the computer’s hostname or IP address into the address bar.
The IP address found in the “IPv4 Address” field will be the same as the one in the “Default Gateway” field. If you do not have a default gateway, the IP address in the “Default Gateway” field will be the same as the “Default Internet Protocol (IP) Address.”
The “Default Domain Name” field will be the same as the computer’s name.
Viewing Your IP Address in Windows 7
If you want to view your IP address in Windows 7, there are a few different ways to do it. The easiest way is to go to the Start Menu and type “cmd” into the search bar. Once you’ve found the command prompt, you can type “ipconfig” into the command prompt and hit Enter. This will open the Windows 7 IPconfig window. Scroll down until you see the “Network Connections” section and click on it. This will open the “Network Connections” window for the current user. In the “Network Connections” window, you will see a list of all the devices that are connected to your computer, including your IP address. To view your IP address, double-click on the “My IP Address” entry in the “Network Connections” window. This will open the “My IP Address” window. The “My IP Address” window will show your IP address, the network number, the subnet mask, and the default gateway.
Changing Your IP Address in Windows 7
If you have a home or small office internet connection, then the most likely solution is to simply change your IP address. This is really easy to do and can be done in just a few minutes, depending on your computer.
To change your IP address in Windows 7:
1. Open the Control Panel.
2. Click on the Network and Internet Connections icon.
3. Under the network connection heading, click on the Properties button.
4. In the General tab, click on the IP address field and type in the IP address of the new network connection.
5. Click on the OK button to apply the changes.
Now you should be able to access the new network connection by typing in the new IP address in your web browser.
That’s all there is to it!
Conclusion
Finding an IP address on Windows 7 can be a bit of a challenge. However, there are a few methods that can be used. One method is to use the Command Prompt. Another method is to use the Windows 7 Network and Sharing Center.

